Effective home studio lighting combines soft keys and background separation to enhance visual appeal. Start with at least four strobes or speedlights and a large softbox for smooth light diffusion. Use a large white sheet to soften backgrounds and bounce light for gentler shadows. Position key lights at 45-degree angles while fill lights operate at 50-75% intensity. For a warmer tone, employ CTO gels. Following these guidelines leads to striking compositions, and valuable insights await those who continue exploring advanced techniques.
Key Takeaways
- Utilize two soft lights positioned at 45-degree angles to create flattering illumination that softens shadows on the subject.
- Introduce a key light as the primary light source to sculpt the subject’s appearance and ensure depth.
- Employ a back light to add separation between the subject and background, enhancing overall depth in the composition.
- Control light spill and focus illumination with grids, maintaining a consistent color temperature around 5500-5600K for key and fill lights.
- Choose a plain backdrop, preferably white, to maximize soft lighting effects and ensure a clean composition free from distractions.
What You Will Need
Creating an effective home studio lighting setup requires thoughtful preparation and the right materials to achieve professional results. Essential items include a large white sheet, at least 1.5m x 1.5m, to serve as a soft backdrop, effectively diffusing light. A minimum of four strobes or speedlights is recommended to provide adequate illumination, though fewer can be sufficient based on specific scenes. Adding a large softbox is vital for creating soft light; smaller options can also enhance effects. Important accessories include two open reflector dishes, one gridded reflector, and two CTO gels for light modification. Additionally, don’t forget to gather extra light stands, crab clamps for securing equipment, and consider broom handles as substitutes for crossbars when necessary. Many industrial light fixtures are compatible with LED, CFL, and incandescent bulbs, offering energy-efficient options that can improve lighting quality while reducing utility costs.
Recommended Products
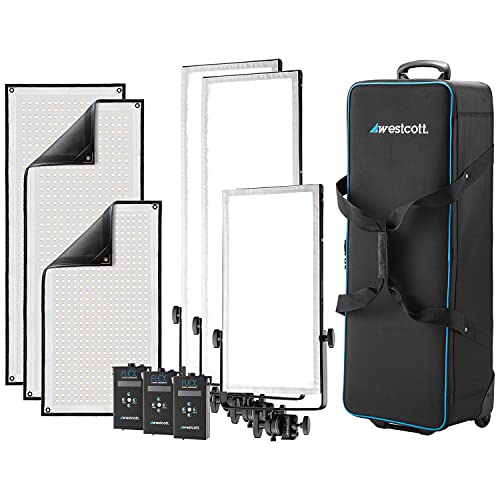
PREMIUM 3-LIGHT FLEXIBLE LED LIGHTING KIT: Includes (2) 1'x3' (100W) & (1) 1'x2' Bi-Color 2800-6000K LED Mats up to 97 CRI, 98 TLCI, (3) Cine Dimmers, (3) AC Adapters, (3) Grip Heads, (3) 1' Yokes, (3) Cine Frames (3) 1-Stop 2-Layer Diffusion, Wheeled Case

Professional off-camera flash and continuous lighting kit designed for photography and video production

Bundle Includes: 1 x Canon EOS 90D DSLR Camera with 18-135mm Lens, 1 x SanDisk SecureDigital 64GB Extreme PRO Memory Card, 1 x Camera Bag, 1 x Corel Photo Software With PhotoMirage, AfterShot, Painter Essentials, PaintShop Pro, and Video Studio, 2 x LPE6 Battery, 1 x Rapid Charger For LPE6, 1 x Memory Card Reader, 1 x Mini Portable LED Video Light , 1 x 3 Piece Pro Filter Kit , 1 x Wide Angle Lens 67MM, 1 x Telephoto Lens 67MM, 1 x 67mm Graduated Color Filter Kit and more...
Don’t Panic

When approaching the task of setting up a home studio, it’s vital to maintain a calm demeanor, as a relaxed attitude often fosters creative solutions for lighting challenges. Beginners should experiment with various lighting options available in their environment before investing in an extensive lighting system. Bouncing light off walls or ceilings can effectively create soft keys; this method alleviates the need for high-end gear. Correctly positioning the key light and backlight plays an important role in achieving effective background separation, adding depth to even the smallest spaces. Utilizing simple tools, such as diffusion materials, reflectors, and gels, can greatly enhance studio lighting while minimizing setup stress, allowing for a more controlled and productive creative process. For those interested in home automation, smart dimmer switches offer customizable lighting control, allowing users to manage ambiance and energy efficiency seamlessly.
The Setup

A well-structured lighting setup transforms a basic home studio into a professional-grade space, greatly enhancing the quality of visual projects. To achieve ideal lighting, utilize a large white sheet as a soft diffusion material, suspending it midway up the room for even top-light. Position four strobes or speedlights strategically: two on either side of the sheet, aimed upward, and a backlight with a grid behind the subject for focused illumination. The softbox should direct its light under the white sheet, ensuring a pleasant distribution across the subject. Adjust color temperature using CTO gels to achieve a range of 3500-3800K, allowing flexibility in warmth. Proper angling of lights maximizes ceiling reflections, softening shadows and enhancing the overall lighting effect. Investing in energy-efficient LED retrofits can significantly reduce energy costs while providing high-quality lighting in your studio.
Recommended Products

Portable 400Ws strobes with removable AC/DC batteries provide 550+ full-power flashes per charge

Fully support 1/8000s High-Speed Sync,Multi Flash, Delay Flash,Mask Function, S1/S2 Optic Triggering, C.Fn Custom Function, etc.

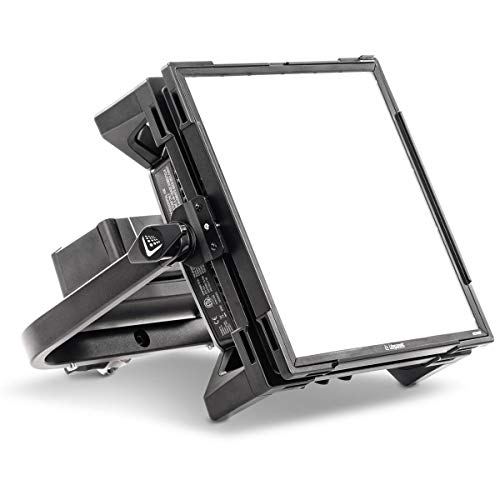
TRUE PARABOLIC STRUCTURE: This item has a true parabolic structure design, and the reflector is made of highly reflective inner silver mesh cloth, making reflected light combines smooth spread, beauty contrast and variable focus.
Step by Step
To achieve professional-quality lighting in a home studio, selecting a well-suited space is essential for controlling ambient light and positioning the backdrop effectively. Begin by placing the key light approximately 3 feet from the subject, angled at 45 degrees and slightly down to create appealing catch lights in the eyes. Next, position the fill light, set at 50-75% of the key light’s intensity, opposite the key light to soften any harsh shadows. Finally, add a backlight behind the subject at a slight angle, enhancing separation from the backdrop while adding depth. Adjustable floor lamps, which often feature energy-efficient LED bulbs, can be utilized for additional lighting flexibility and efficiency. Adjust these lights thoughtfully, incorporating diffusion materials or reflectors to soften shadows and guarantee an even lighting quality that flatters your subject.
The Backdrop
Choosing the right backdrop is critical for creating a visually stunning home studio, as it serves to frame the subject while establishing the overall tone of the shot. A plain, wrinkle-free sheet or wall is ideal, minimizing distractions and ensuring the subject stands out effectively. White backdrops enhance soft lighting effects, while darker colors add depth and a dramatic atmosphere. It is important to fill the camera frame appropriately with the backdrop, positioning the subject at an ideal distance to maintain separation. Dynamic backgrounds, like office settings, can complement the subject but must remain clutter-free to maintain focus. Ultimately, the backdrop plays a significant role in enhancing the visual aesthetic of the shoot, supporting the subject’s presentation and mood. When selecting lighting for your home studio, consider energy-efficient models that can save up to 80% on electricity bills, ensuring both style and sustainability.
The White Sheet
The white sheet serves as a versatile and effective solution for enhancing lighting in home studio environments. A large white sheet, ideally 1.5m x 1.5m, offers a smooth, diffuse surface that softens harsh shadows. By suspending it midway up the room, it acts as a soft top-light, distributing illumination evenly across the subject. Lights positioned to bounce off the ceiling rather than hitting the sheet directly further enhance this soft effect, ensuring a flatter, more appealing lighting setup. For accessibility, an inexpensive white bed sheet can serve the same purpose. Integrating the white sheet into the lighting setup not only improves light quality but also enhances background separation, giving a cleaner, more professional appearance to the final image. Adjustable brightness is a key feature to consider for tailored illumination, ensuring the lighting conditions can be customized to suit different studio setups.
Recommended Products

【65" Magic Mirror Photo Booth 】 This 65-inch magic mirror photo booth is fitted with a 43-inch touchscreen and preloaded with Windows 11. Equipped with an Intel i5 processor, 8GB RAM and 256GB SSD, it ensures exceptionally smooth operation. You can take photos with one click and get instant prints, then share pictures via SMS, email, QR code, Facebook, Instagram and Twitter. The package contains a camera, a printer, 108 sheets of photo paper, 2 ink cartridges, playful props and a red carpet, delivering an all-in-one premium photography experience.

PICTURE-PERFECT PRINTS Built-in flash and LED ring light make it easy to get that picture-perfect shot, every time. Select your layout, frame, and filters and get a live view of it all on the 10.1” LCD touch screen before hitting print.

PREMIUM FOAM BOARD 24 x 36 & MORE – Lightweight yet rigid foam board available in 24x36, 36x48, 20x30, 30x40, 16x20, and 18x24 sizes. Ideal for framing, signage, printing, or use as a foam poster board for events, school, or business.
The Lighting
Effective lighting is essential in a home studio, as it transforms the overall quality of any visual project. A three-point lighting setup is a must-have for achieving soft yet impactful illumination. Begin by establishing a primary light source, positioned to cast a gentle glow on the subject. The use of a large white sheet can effectively diffuse this light, reducing harsh shadows. Next, add two additional lights on either side, angled to preserve even light distribution across the subject’s features. Finally, implement a backlight equipped with a grid to enhance separation from the background, creating a sense of depth. To guarantee a cohesive look, utilize CTO gels and adjust the camera’s white balance close to 3500K for ideal warmth. Night lights with light-sensing technology can also be used in a home studio to provide subtle ambient lighting that adjusts automatically, ensuring an optimal environment for creativity.
Recommended Products

Ikan Rayden 1 x 1 Bi-Color 3200K-5600K Adjustable Studio/Field LED Light, Barn Doors Included - Black

Bright consistent light across all color temperatures

Ikan Rayden 3200K-5600K Adjustable Studio/Field LED Light, Barn Doors Included Black
The Two Soft Lights
Achieving an inviting and professional atmosphere in a home studio relies heavily on the use of two soft lights, which provide a balanced, flattering illumination that complements the key light. Position these soft lights at 45-degree angles on either side of the subject for effective shadow softening and feature enhancement. Utilizing softboxes or diffusers is essential, as they evenly disperse the light, creating softer edges in video production. The intensity of these soft lights should be lower than the key light, ensuring the key light remains the primary focus. Additionally, adjusting the distance of the soft lights from the subject can greatly affect softness; closer positions yield a gentler effect while further placements introduce more drama to the scene. For those seeking energy-efficient options in home studio setups, considering LED technology minimizing energy consumption can be a substantial benefit.
Recommended Products
Front area dimension: 11.25" x 11.25"

95+ CRI Chip LEDs paired with 1/2 stop soft diffusion panel

Godox KNOWLED F600Bi waterproof flexible LED mat panel for film, broadcast & video production
The Back Light
Positioning a back light in a home studio setup is essential for enhancing the overall visual experience, as it creates depth and separation between the subject and the background. This light, often referred to as hair light or rim light, should be placed behind the subject, angled opposite the key light, and approximately three feet away. It should illuminate the subjects face from above, without casting harsh highlights or glare, especially for those wearing glasses. Using grids on the back light assists in focusing the illumination on the subject, mitigating light spill onto the backdrop. Incorporating this back light is a vital step, as it highlights the subject, enhancing their visibility and creating engaging imagery through effective separation.
The Key/Fill Light
In a well-equipped home studio setup, the key light serves as the foundational light source, essential for sculpting the subject’s appearance and defining their features. Typically positioned at a 45-degree angle from the subject, the key light illuminates at a distance of approximately three feet. Balancing this is the fill light, strategically placed opposite the key light, operating at 50-75% intensity to soften shadows. Together, these lights achieve a soft, flattering look. Maintaining a consistent color temperature, ideally around 5500-5600K, is vital for replicating natural skin tones and avoiding color inconsistencies. By adjusting intensity and position, the key and fill lights can create enchanting catch lights that enhance the subject’s overall appeal, making this setup a must-have for serious home studios. Incorporating picture lights with adjustable brightness settings can further enhance the ambiance by offering precise control over lighting conditions, adding an extra layer of versatility to your home studio.
CTO Gels
CTO gels, or Color Temperature Orange gels, play a crucial role in achieving the desired warmth in lighting setups. These gels are primarily used to convert daylight-balanced lights, around 5500K, to warmer tungsten-like color temperatures of approximately 3200K. This adjustment is essential for maintaining color balance in mixed lighting environments. Available in various sizes and strengths, including full, 1/2, and 1/4 CTO, photographers can make precise adjustments according to specific creative needs. When used with backlights, CTO gels enhance mood and atmosphere, creating visually compelling effects. Constructed from heat-resistant materials, these gels withstand high temperatures without degrading. Energy-efficient LED options are often compatible with CTO gels, allowing photographers to reduce electricity costs while achieving desired lighting effects. For those interested, gel packs can be conveniently obtained from photography supply websites, making these must-have tools for any lighting setup.
Camera Settings
Effective camera settings are essential for achieving the desired image quality, especially when working with various lighting arrangements. Start by setting the aperture to f2, which creates a shallow depth of field for a pleasing bokeh effect that highlights the subject. Utilize a shutter speed of 1/125th to freeze motion while maintaining adequate exposure in well-lit conditions. Keep the ISO sensitivity at 30 to minimize noise, adjusting it according to your specific lighting setup. Initially set the white balance to approximately 3500K, then fine-tune it to around 3800K during post-processing for warmer colors. By effectively using white balance, one can enhance video quality and guarantee consistent color representation, improving the overall impact of your images.
Frequently Asked Questions
What Is the 3 Lighting Rule?
The three-point technique employs a key light, fill light, and backlight to achieve ideal lighting ratios and effective shadow management. This method enhances depth and separation, creating visually compelling images in photography or videography.
What Is the 5 7 Lighting Rule?
The 5 7 lighting rule suggests positioning the key light 5 feet and the fill light 7 feet from the subject. This setup balances hard light techniques while considering color temperature effects and lighting equipment basics for ideal results.
How to Create Soft Light in a Studio?
To create soft light in a studio, one should utilize a softbox setup with diffuser materials, position lights at an appropriate distance, and adjust light intensity to achieve an even, flattering illumination across the subject.
What Are the Three Types of Studio Lighting?
Approximately 70% of professional photographers utilize three-point lighting systems. These setups consist of key light techniques, fill lights, and backlights, all essential for creating effectively balanced illumination and enhancing the impact of ambient light sources.