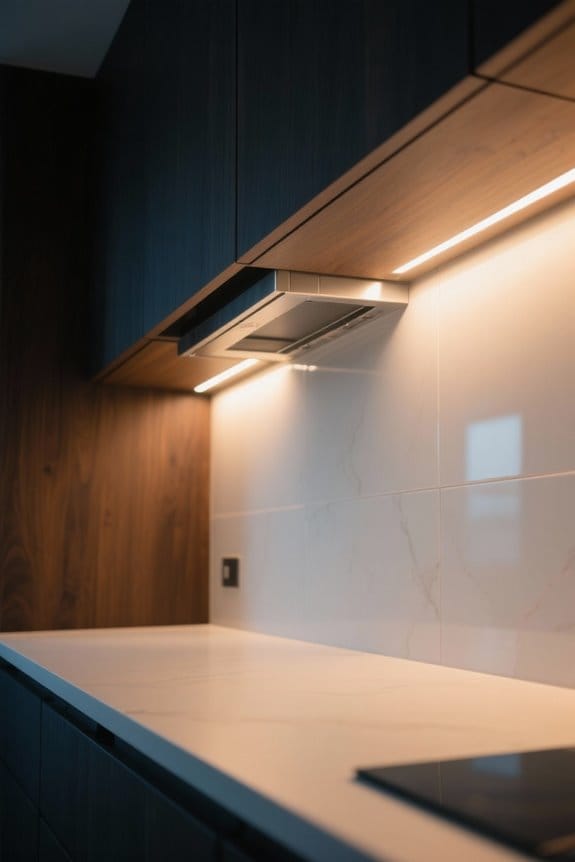
Properly placed under-cabinet lighting is essential for avoiding multi-shadow scallops on countertops. To achieve uniform illumination, position LED strips centered above work areas, keeping them 1 to 2 inches from the front edge. Smaller recessed downlights, ideally 2-3 inches, can enhance visibility without glare. Light rail molding can conceal fixtures and diffuse harsh light. Aiming for at least 250 lumens per linear foot guarantees adequate brightness. Exploring additional strategies can further improve kitchen lighting effectiveness.
Key Takeaways
- Center LED strips above countertops to minimize harsh shadows and achieve even illumination.
- Use multiple smaller downlights rather than larger fixtures for better light distribution.
- Position lighting 1 to 2 inches from the front edge of cabinets for maximum coverage.
- Avoid placing lights directly above the backsplash to improve workspace visibility.
- Aim for a lumen output of at least 250 per linear foot for sufficient brightness.
Understanding Multi-Shadow Scallops

Understanding multi-shadow scallops is essential for achieving ideal lighting in kitchen spaces. These scallops occur when under-cabinet lighting is poorly positioned, resulting in uneven shadows on countertops that can hinder visibility during food preparation. To promote even illumination, careful fixture positioning is vital. Placing lights too far back can direct light towards the wall instead of the working surface, exacerbating the shadowing effect. Utilizing multiple smaller downlights instead of a single fixture contributes to uniform light distribution, while aligning under-cabinet lights along the front edges of cabinets facing downwards can further reduce shadows. Additionally, LED tape lights, when installed correctly, provide an even wash of light on countertops, effectively combating the challenges posed by multi-shadow scallops. For energy efficiency, many under-cabinet lighting options use LED technology to minimize electricity consumption, reducing energy costs while enhancing brightness.
Recommended Products

Flexible silicone cased tape light for enhanced Damp location listing. Peel and stick3 construction adhesive on back
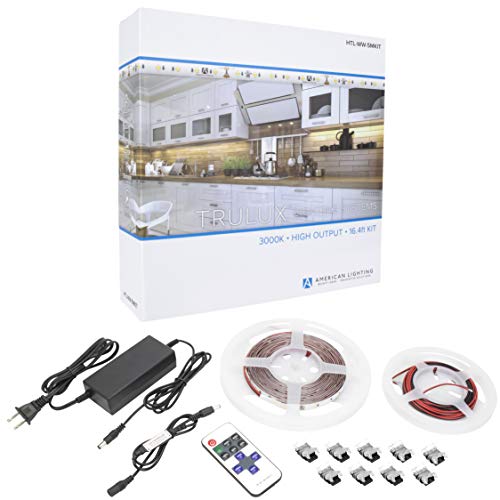
SUPERIOR-COLOR RENDERING: 3000K Warm White CCT LED tape provides best-in-class color rendering (96+ CRI), creating a natural light that displays colors accurately

Flexible silicone cased tape light for enhanced Damp location listing. Peel and stick3 construction adhesive on back. Indicator marks every 6 inch for field cutting at the end of a run
Best Practices for Under-Cabinet Lighting Placement

Proper placement of under-cabinet lighting plays an essential role in creating a well-lit, functional kitchen environment. For ideal results, position LED strips centered above countertops to promote even illumination and minimize the risk of harsh shadows. Avoid locating lights directly above the backsplash, as this can obstruct visibility. Prior to installation, test the placement to achieve a balanced lumen output of 250 or more per linear foot. Use linear LED strip lights instead of puck lights to prevent uneven lighting patterns and glare. For maximum illumination coverage, position under-cabinet lighting 1 to 2 inches from the front edge of the cabinets. Following these best practices will enhance both visibility and aesthetic appeal in the kitchen. Consider using dimmable feature options to adjust lighting intensity according to your needs and preferences.
Recommended Products

[Colors Changeable & Brightness Dimmable] You can easily switch between color temperatures like 3000K for warm light, 4000K for neutral light, and 6000K for white light, adapting to various conditions. You can also adjust the brightness to your comfort level.

Built-In LED Lights with Soft Touch Control: This bathroom vanity features dual-side soft LED lighting for safe nighttime visibility without disturbing others. Convenient soft-touch switches on both sides and easy wall plug-in installation—no hardwiring needed.

InvisiLED PRO 1ft 40 Pack Tape Light in 2700K Warm White. Integrating high performance and innovative technology in a professional grade low profile lighting solution, InvisiLED Pro offers dimmable, energy efficient LED tape that installs easily to illuminate fine wood cabinets
Selecting the Right Lighting Fixtures

Selecting appropriate lighting fixtures is essential for effective kitchen functionality. Opt for multiple smaller recessed downlights, ideally sized at 2-3 inches, to achieve even light distribution and minimize the risk of multi-shadow scallops on counters. Under-cabinet lights should be centered directly above the counters, facing them to enhance visibility during food preparation. Bright LED lighting choices, such as light bars and mounted strip lights, are preferable to puck lights, as they provide more illumination. Additionally, guarantee that lighting placement occurs at the front of wall cabinets, avoiding shadows that interfere with workspace efficiency. Motion sensors in various models help extend battery life by activating lights as needed, contributing to overall reduced electrical costs. Investing in the right lighting fixtures makes a distinct difference in a kitchen’s usability and ambiance.
Recommended Products

PREMIUM MATERIALS - The Kenmore wine fridge is constructed with high-quality materials, including "wine view" beechwood bottle racks. These racks not only provide sturdy & stylish storage for the wine bottles but also enhance the overall aesthetic of the cooler. The use of premium materials ensures durability & a refined appearance that complements any setting.

ELEGANT AESTHETIC - The Kenmore wine cooler sleek black cabinet, combined with a seamless stainless steel door frame & handle, contributes to the sophisticated design of The Kenmore 112 Bottle Slim 18-Inch Wine Cooler. these premium materials enhance durability & complement any decor, making it a stylish addition to any space. the elegant design ensures that the cooler blends seamlessly with various interior styles.

【155 Bottle Capacity – Space for Your Collection】This 24-inch Dual Zone Wine Cooler fits standard kitchen cabinetry—so it can be built in for a seamless look or used freestanding wherever you need it. Inside, it holds at least 155 Bordeaux-style wine bottles (750ml), giving your collection a dedicated home. No more squeezing bottles into the kitchen fridge—your wines have the space they deserve.
Enhancing Aesthetics With Light Rail Molding
Incorporating light rail molding can remarkably elevate the visual appeal of a kitchen while serving practical purposes. This molding conceals under-cabinet lighting fixtures, providing a seamless look that enhances overall aesthetics. By diffusing light, it meaningfully reduces harsh shadows and scallops that often cast unsightly patterns on countertops. Custom light rail molding can be tailored to complement cabinet styles and colors, achieving a cohesive design that unifies the kitchen environment. Additionally, the addition of this feature elevates decorative elements without hindering functional lighting effectiveness at work surfaces. Proper installation of light rail molding guarantees a polished finish, improving both the design integrity and functionality of under-cabinet lighting—making it a must-have enhancement for any modern kitchen. Moreover, using LED cabinet lights ensures energy efficiency and a longer lifespan, further enhancing the overall functionality and sustainability of the kitchen lighting setup.
Recommended Products

Hutch with 4 doors and light function

Hutch with 4 doors and light function

UNIQUE CHANDELIER MEDALLION: Our square ceiling medallion offers old-world elegance, accenting ceiling lights and fans in style. This architectural ceiling decor features raised scrolled accents surrounding a large round recessed central dome.
Importance of Consistent Illumination
Consistent illumination serves as a fundamental aspect of effective kitchen design, particularly in areas dedicated to food preparation. Under-cabinet lighting must feature even light distribution to prevent harsh shadows that can disrupt cooking tasks. Utilizing linear LED strips is preferable, as they provide better coverage compared to puck lights, enhancing overall visibility on countertops. Moreover, appropriate light placement is vital; positioning lights centered above work areas guarantees consistent illumination and superior functionality. Aiming for a lumen count of at least 250 per linear foot helps maintain a bright workspace, effectively reducing shadowing. Finally, testing configurations before final installation is important to identify ideal placements, assuring an inviting and functional kitchen environment free from dark patches. With advanced smart dimmer switches, homeowners can integrate automation to control under-cabinet lighting, enhancing both energy efficiency and user convenience.
Recommended Products

【 Aluminum LED Channel 】: LED channel skirting is made of durable and high quality aluminum material, unlike yellowed and cracked traditional plaster line. The baseboard lighting trim is no rust, no paint peeling with long service life

▶ Hardwired or Plug-in Installation – Install as permanent LED under cabinet lighting with direct wire, or use a plug-in for quick setup without an electrician. Flexible solution for kitchens, closets, and workspaces

ETL Standard: Safe and reliable LED neon rope lights(7 mm W*14.5 mm H) of ETL standard with fused plug and pure copper wire. High-qualified products of anti-yellowing PVC coating for more than 2 years, long lifespan of more than 50,000+ hrs. AC high volt 110-130V plug & play with a low power consumption of 7 W/M. When hardwired, professional electrician installation recommended
Frequently Asked Questions
How to Hide Countertop Seams?
To hide countertop seams, strategic seam placement guarantees visual continuity. Material selection and color matching enhance aesthetics, while grout considerations, counter thickness, and joint alignment minimize gaps. Additionally, light reflection and hidden fasteners aid design integration effectively.
How Do You Fill the Gap Between Countertops and Cabinets?
To fill the gap between countertops and cabinets, one can use gap sealants or decorative molding. Consider countertop materials and aesthetic finishes that harmonize with cabinet height, ensuring seamless seam alignment and easy maintenance within the kitchen design.
What Is the 3×4 Kitchen Rule?
Like painter’s brushstrokes on canvas, the 3×4 kitchen rule emphasizes ideal under-cabinet lighting placement—3 inches from the back wall and 4 inches from the cabinet edge—enhancing kitchen workflows and reducing shadows for improved layout efficiency.
How Do You Transition Between Countertops and Backsplash?
To shift between countertops and backsplashes, one should prioritize color coordination and design patterns. Utilize tile alignment, sealing edges, and various backsplash styles, ensuring aesthetic harmony and maintaining visual continuity for an appealing finish.